Adding pictures to your WordPress posts makes them look nice and interesting. But sometimes, you want the words to go around the picture. This makes your page look very professional. The good news is that the WordPress Block Editor, which some call Gutenberg, has a simple way to wrap text around image in WordPress block editor.
This guide will show you every step. You will learn how to wrap text around image in WordPress block editor, even if you never tried before. Let’s start learning how to wrap text around image in WordPress block editor and make your content shine.
Step 1: Open Your WordPress Post or Page
First, you need to log in to your WordPress site. Then, go to the post or page you want to change. If your goal is to wrap text around image in WordPress block editor, it’s important to start in the right place.
- Go to your WordPress dashboard.
- Find “Posts” or “Pages” on the menu and click it.
- Choose the post or page you want to work on.
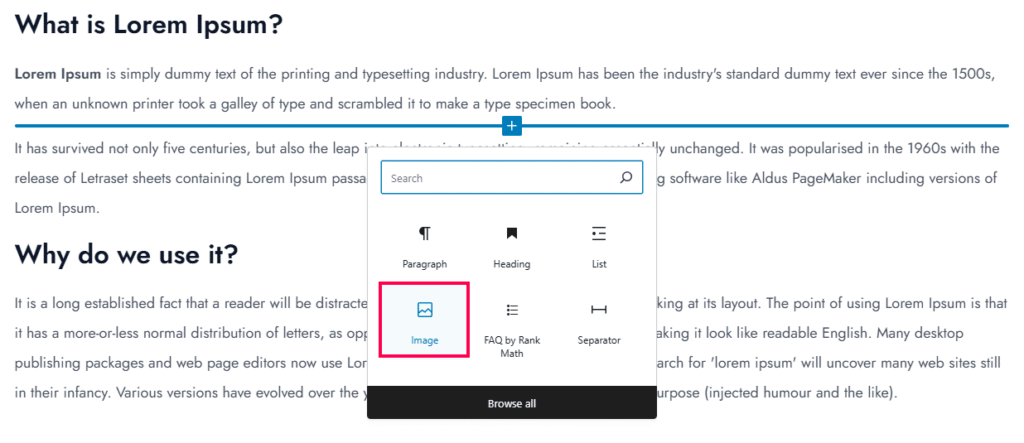
Step 2: Add an Image Block
Now you are in the editor. The next thing is to add your picture. It is easy to begin the process to wrap text around image in WordPress block editor.
- Click the “+” button. This button lets you add a new block.
- You can look for “Image” in the block list or just type “Image” in the search box.
- Select the Image block when you see it.
Step 3: Upload or Select Your Image
After you add the Image block, you have two choices. You can add a new picture from your computer or use one that is already on your site.
- Upload: Click the “Upload” button to pick a picture from your computer.
- Media Library: If your picture is already on your website, click “Media Library” to find and select it.

This choice is an important part of the steps when you wrap text around image in WordPress block editor.
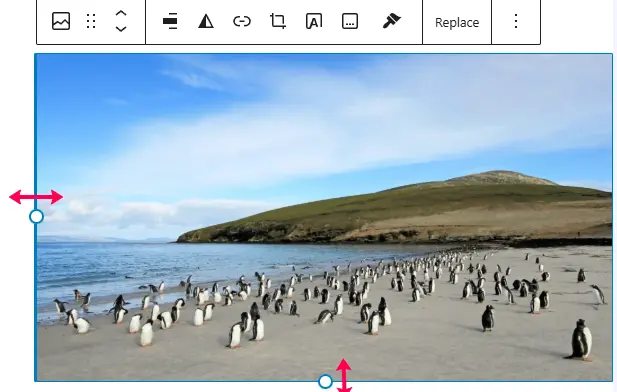
Step 4: Align the Image
Your picture is now on the page. It is time to wrap text around image in WordPress block editor by changing the picture’s alignment.
- Click on the picture to select it.
- A small toolbar will show up above the picture. You will see alignment buttons.
- Align Left: This puts the picture on the left. The text will be on the right side.
- Align Right: This puts the picture on the right. The text will be on the left side.
- Center: This puts the picture in the middle. The text will not wrap.
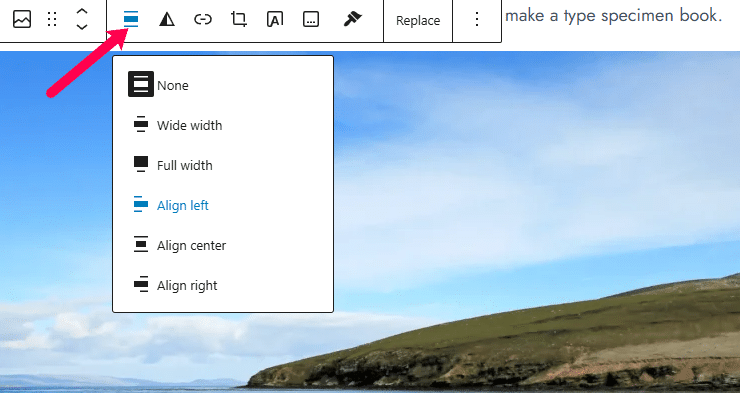
To wrap text, you should pick either “Align Left” or “Align Right”. Choose the one that looks best for your page.
Step 5: Adjust Image Size (Optional)
Sometimes the picture is too big or too small. You might want to change its size so the text looks good next to it. When you wrap text around an image in the WordPress block editor, size matters a lot for a perfect look.
- Click the picture to select it.
- You can pull the small blue dots on the corners of the picture to make it bigger or smaller. Or, you can look at the “Image settings” on the right side of your screen to type in a size.
Step 6: Add Your Text Block
Now that your picture is in place, you can add your words.
- Click the “+” button one more time and choose the “Paragraph” block.
- You can start writing your text or copy and paste it into this block.
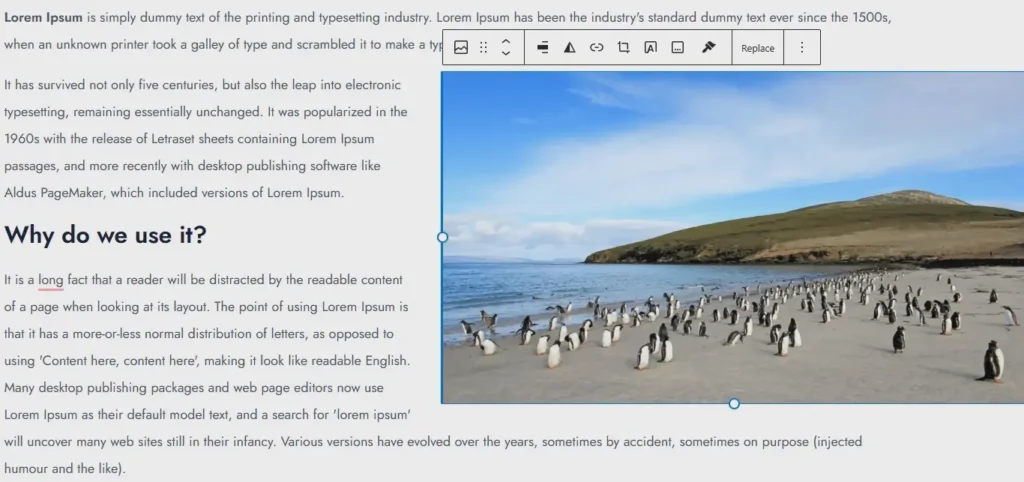
The text will now automatically move around the picture. It will follow the alignment you picked in the earlier step to wrap text around image in WordPress block editor.
Step 7: Preview Your Page
Before you make your changes live, it is smart to check how it looks.
- Find the “Preview” button at the top of the editor and click it.
- Look at the page. Make sure the picture and the text look exactly how you want. Now, your steps to wrap text around image in WordPress block editor should pay off.
Step 8: Publish or Update Your Post
If everything looks good and you are happy, you can save your work. Click the “Publish” or “Update” button. Now everyone can see your beautiful page.
Pro Tips
- If you need more control over the design, you can use a “Custom HTML Block.” This lets you add your own styling code to wrap text around image in WordPress block editor in special ways.
- Do you want text to wrap around many pictures together? Try using a “Gallery Block.”
- Always remember to add “alt text” to your pictures. This is very important for search engines and for people who cannot see the images. It also helps when you wrap text around image in WordPress block editor and want your site to be easy for everyone.
With these steps, anyone can wrap text around image in WordPress block editor and feel proud of the results.
Conclusion
Making text wrap around image in WordPress block editor is a simple trick. It makes your content look much more professional and is nice for your readers. When you follow these steps, you can make your posts more engaging. You have learned not just how to add a picture, but how to wrap text around image in WordPress block editor to make your posts stand out.
Feel free to play with the different settings. Try different alignments and sizes to see what layout you like the most for your content.